
Event Handle
- Event : 사용자가 하는 행동 (ex. 마우스 이동, 클릭 키보드 입력..)
- Event Handle : 이벤트 발생 시, 원하는 동작을 할 수 있도록 선언 하는 것.
- Event Handler : 이벤트 발생 시, 실행 할 문장을 작성한 부분
자바 스크립트에서 이벤트 핸들러를 등록하는 방법
1. HTML 요소의 속성으로 등록
<!DOCTYPE html>
<html lang="ko">
<head>
	<meta charset="UTF-8">
    <title>Title</title>
    <script>
    	function displayTime() {
        	var a = new Date();
            console.log(""+a.toLocaleString());
       }
    </script>

</head>
<body>
	<input type="button" value="click" onclick="displayTime()">
</body>
</html>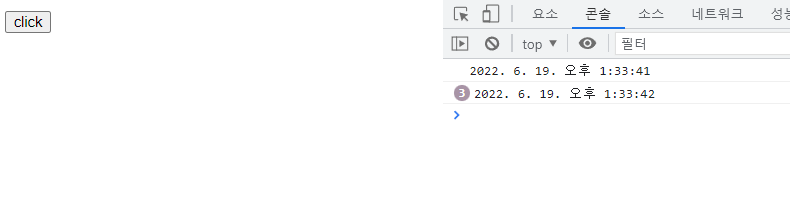
HTML의 input 이벤트 요소의 속성에는 여러가지가 있다.
| onclick | 마우스 클릭 |
| ondbclick | 마우스 더블 클릭 |
| onmousemove | 마우스 포인터가 HTML 요소 위에서 움직일 때 |
| onmouseout | 마우스 포인터가 HTML 요소를 벗어날 때 |
| onmouseover | 마우스 퐁니터가 HTML 요소 위에 있을 때 |
| onkeypress | 키보드의 키를 누르고 손을 뗐을 때 |
| onchange | input 요소의 값이 바뀌었을 때 |
| onfocus | input 요소에 포커스가 갔을 때 |
| onblur | input 요소가 포커스를 잃을 때 |
2. DOM 요소의 Property 등록
DOM(Document Objectd Model)은 자바스크립트 등 프로그램이 HTML 요소를 조작 할 수 있도록 제공되는 인터페이스
이다. 화면에 문자열을 출력하는 'document.write();' 함수의 'document'가 DOM의 객체이다.
<!DOCTYPE html>
<html lang="ko">
<head>
	<meta charset="UTF-8">
    <title>title</title>
    <script>
    	function displayTime() {
        	var a = new Date();
            console.log("" + a.toLocaleString());
    }
    window.onload=function() {
    var button = document.getElementById("button");
    button.onclick = displayTime;
    };
    </script>
</head>
<body>
	<input type="button" value="click" id="button">
</body>
</html>
window.onload 는 브라우저가 HTML을 다 읽었을 때 호출될 함수를 저장하는 property이다.
document 객체를 통해 "button" 의 id를 가진 요소를 불러와 button 변수에 저장을 하고, onclick property에
이벤트 처리 함수인 displayTime() 함수를 등록한다.
3 .addEventListener 메서드 사용
// addEventListener() 메서드 사용 방법

target.addEventListener(type, listener(a), useCapture);


// target - document에서 읽어온 input 요소
// type - 이벤트 타입(onclick, onmouseover 등)
// listener - 등록할 이벤트 핸들러
// useCapture - 이벤트 단계 중 캡쳐링 단계에서 실행할 것인가에 관한 값( true, false )
<!DOCTYPE html>
<html lang="ko">
<head>
	<meta charset="UTF-8">
    <title>title</title>
    <script>
    	function displayTime() {
        	var a = new Date();
            console.log("" + a.toLocaleString());
    }
    window.onload=function() {
    var button = document.getElementById("button");
   	button.addEventListener("click", displayTime, false);
    button.addEventListener("click", function() {
        console.log("click");

    });
}
    </script>
</head>
<body>
	<input type="button" value="click" id="button">
</body>
</html>
onclick 함수와 비슷하지만, addEventListener 메서드를 사용하면 위 예제처럼 하나의 이벤트에 핸들러를 여러 개
등록을 할 수 있다.
Mouse 이 외의 이벤트
키보드 이벤트
| keyPress | - 키보드의 키를 누를 때 - Alt,Ctrl, Shift, Ese key 등 몇 가지 키는 이벤트를 발생 시키지 않는다. |
| keyDown | 키보드 의 키를 누를 때 |
| keyUp | 눌렀던 키를 놓을 때 |
기타 이벤트
| focus | 요소가 포커스를 얻었을 때 |
| blur | 요소가 포커스를 잃었을 때 |
| change | 요소의 속성 값이 변경 되었을 때 |
| load | 요소가 로딩이 완료 되었을 때 |
| submit | form 요소의 reset 버튼이 눌렸을 때 |
| reset | form 요소의 reset 버튼이 눌렸을 때 |
| resize | 요소의 사이즈가 변경 되었을 때 |
| error | 요소 로딩 중 에러가 발생 했을 때 |
'Frontend > JAVASCRIPT' 카테고리의 다른 글
| [JAVASCRIPT] Map (0) | 2022.06.20 |
|---|---|
| [JAVASCRIPT] Hoisting, 호이스팅 (0) | 2022.06.13 |
| [JAVASCRIPT] 변수 선언, let, var, const (0) | 2022.06.13 |
| [JAVASCRIPT] 자바스크립트 기본 문법 (0) | 2022.06.11 |